Optimium
How to build an Avail-powered optimium?
There are a number of tools to spin up an optimium today. We are actively integrating with rollup stacks to give you, the developer, maximum flexibility when choosing the stack of your choice while also retaining the benefits that Avail provides. Today you can spin your optimium up with the following frameworks below.
What is an optimium?
An optimium is a scaling solution that processes transactions and enforces integrity in an optimistic manner like optimistic rollups, but does not store transaction data on Ethereum. The transaction data in this case can be stored on Avail DA to ensure cost-efficient, verifiable, and scalable data availability.
Instead of publishing data on a centralised DAC (Data Availability Committee), rollups can use Avail to significantly reduce trust assumptions and improves the blockchain’s decentralization guarantees.
The advantage of using Ethereum as a DA layer, is that rollups can inherit Ethereum’s security guarantees. Anyone can access the L2s transaction data posted on Ethereum and use it to derive the correct chain state of the L2.
This benefit however comes with a significant cost. Ethereum was not meant to be used as a DA solution and is not optimized for this use case. While work is being done to improve this, at the time of writing up to 90% of the costs paid by L2s to Ethereum is for managing data availability. High volume use cases processing a lot of transaction data, can bring these costs down significantly by using a purpose built data availability solution like Avail .
Architecture of an optimium on Avail
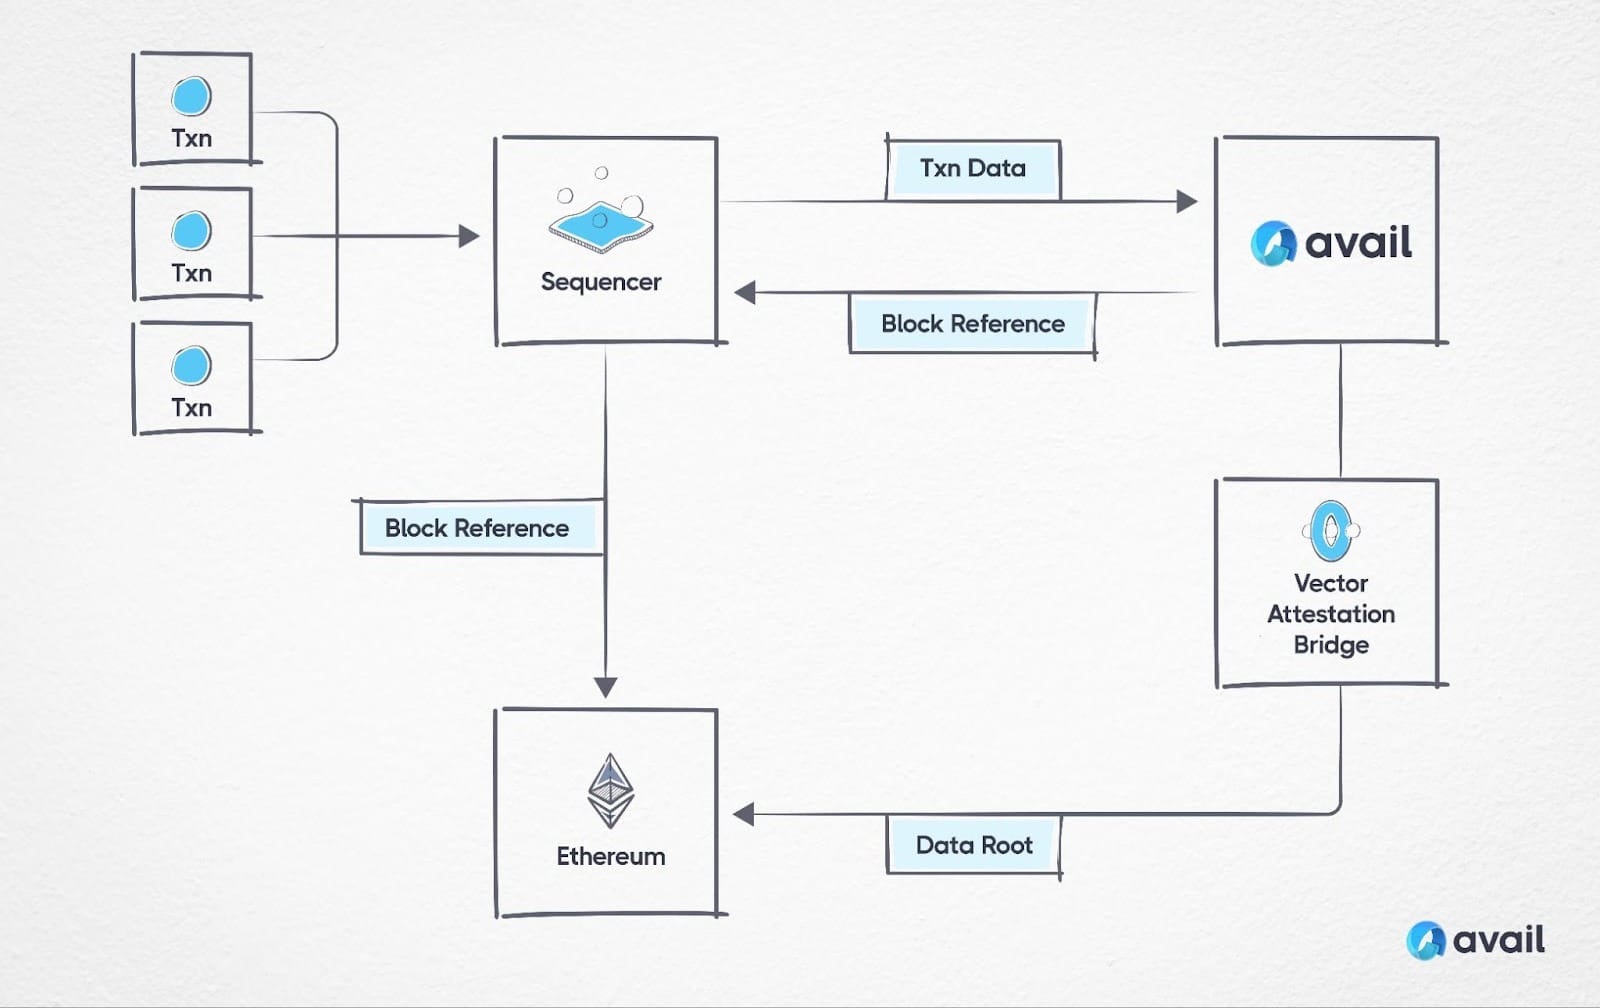
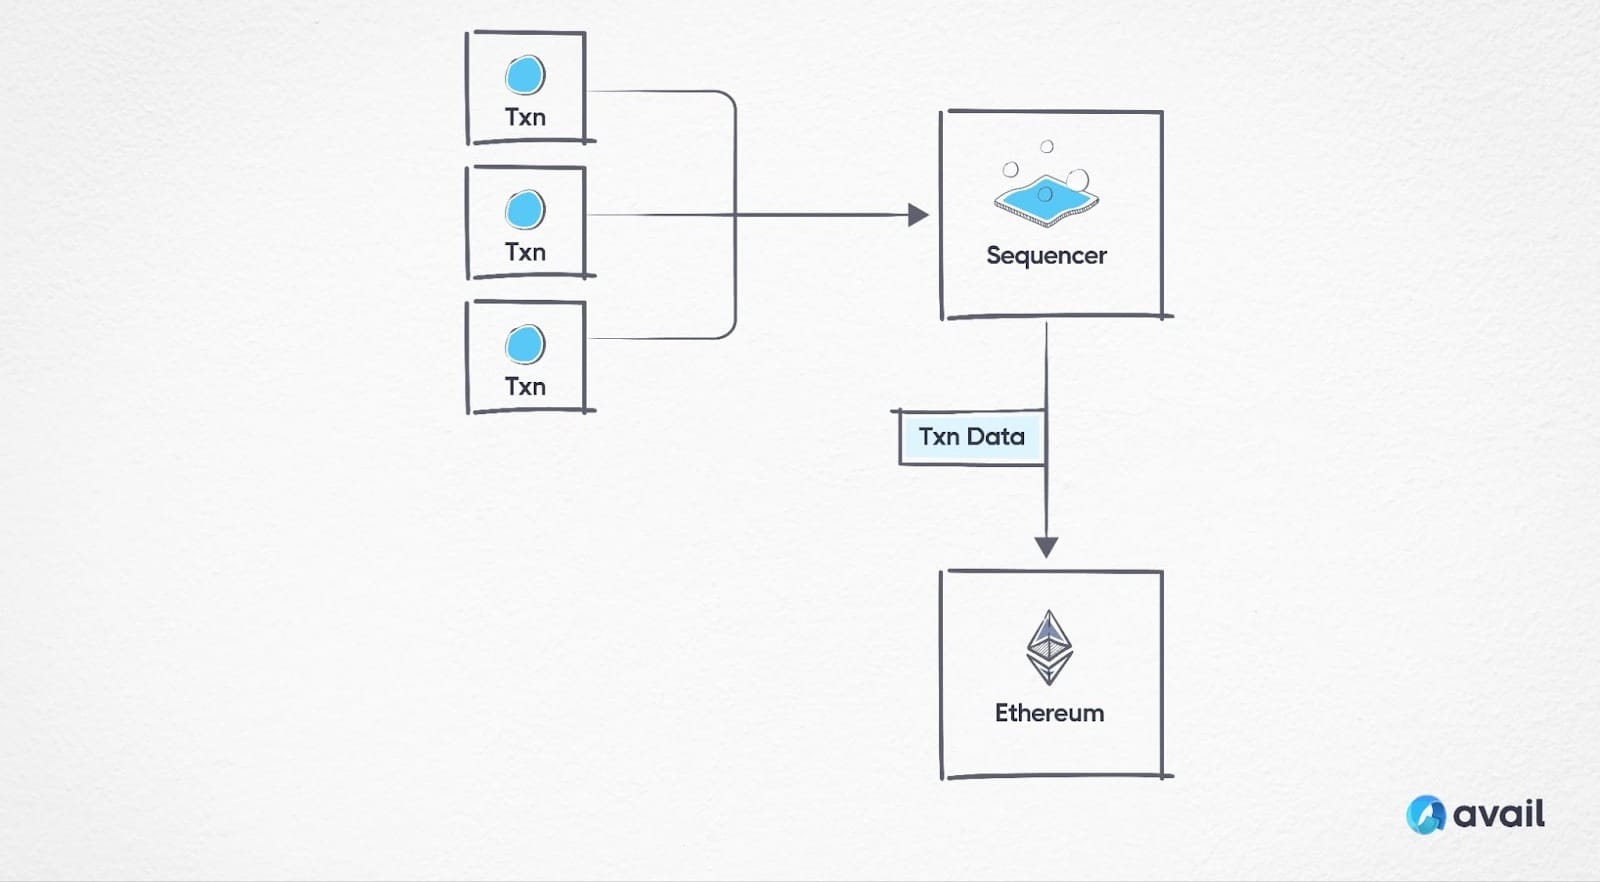
Generally, in optimistic rollups, the L2 transactions get submitted to the sequencer which is then responsible for ordering transactions and creating L2 blocks. Batches of transactions are sent by the sequencer to Ethereum which submits transaction data as blobs or calldata.
In an optimium on Avail, the transactions sent to the sequencer are ordered, and batches of the transaction data is posted to Avail DA. Avail returns a block reference to the sequencer which proceeds to post it on Ethereum. The commitment of the data posted on Avail is also retrievable on Ethereum via Avail’s VectorX attestation bridge.