Avail Node - Simple Deployment
Introduction
ASSISTED DEPLOYMENT
If you prefer running your Avail validator with the help of an infrastructure provider, you can check out on-finality’s docs here .
This guide aims to help you learn the basics of deploying your Avail Node manually or by docker/podman.
Cloud Server
Deploying long-lasting services is best done on an online machine more than 99% of the time and is dedicated solely to running that service. This means that your Avail Node should not be deployed on a personal computer; running it on your Homelab or a cloud provider is a better option.
There are many cloud providers to choose from. Here are some of them:
- AWS
- Microsoft Azure
- OVHCloud
- DigitalOcean
- Linode
- Google Cloud Platform
It’s up to you to research and pick one that will suit all your needs and requirements. If you already have a running server, you can skip the rest of this section and go straight to the next one. That said, Latitude is used for this chapter and here are the steps on how to create a new instance there:
-
First, create a project and give it a name.
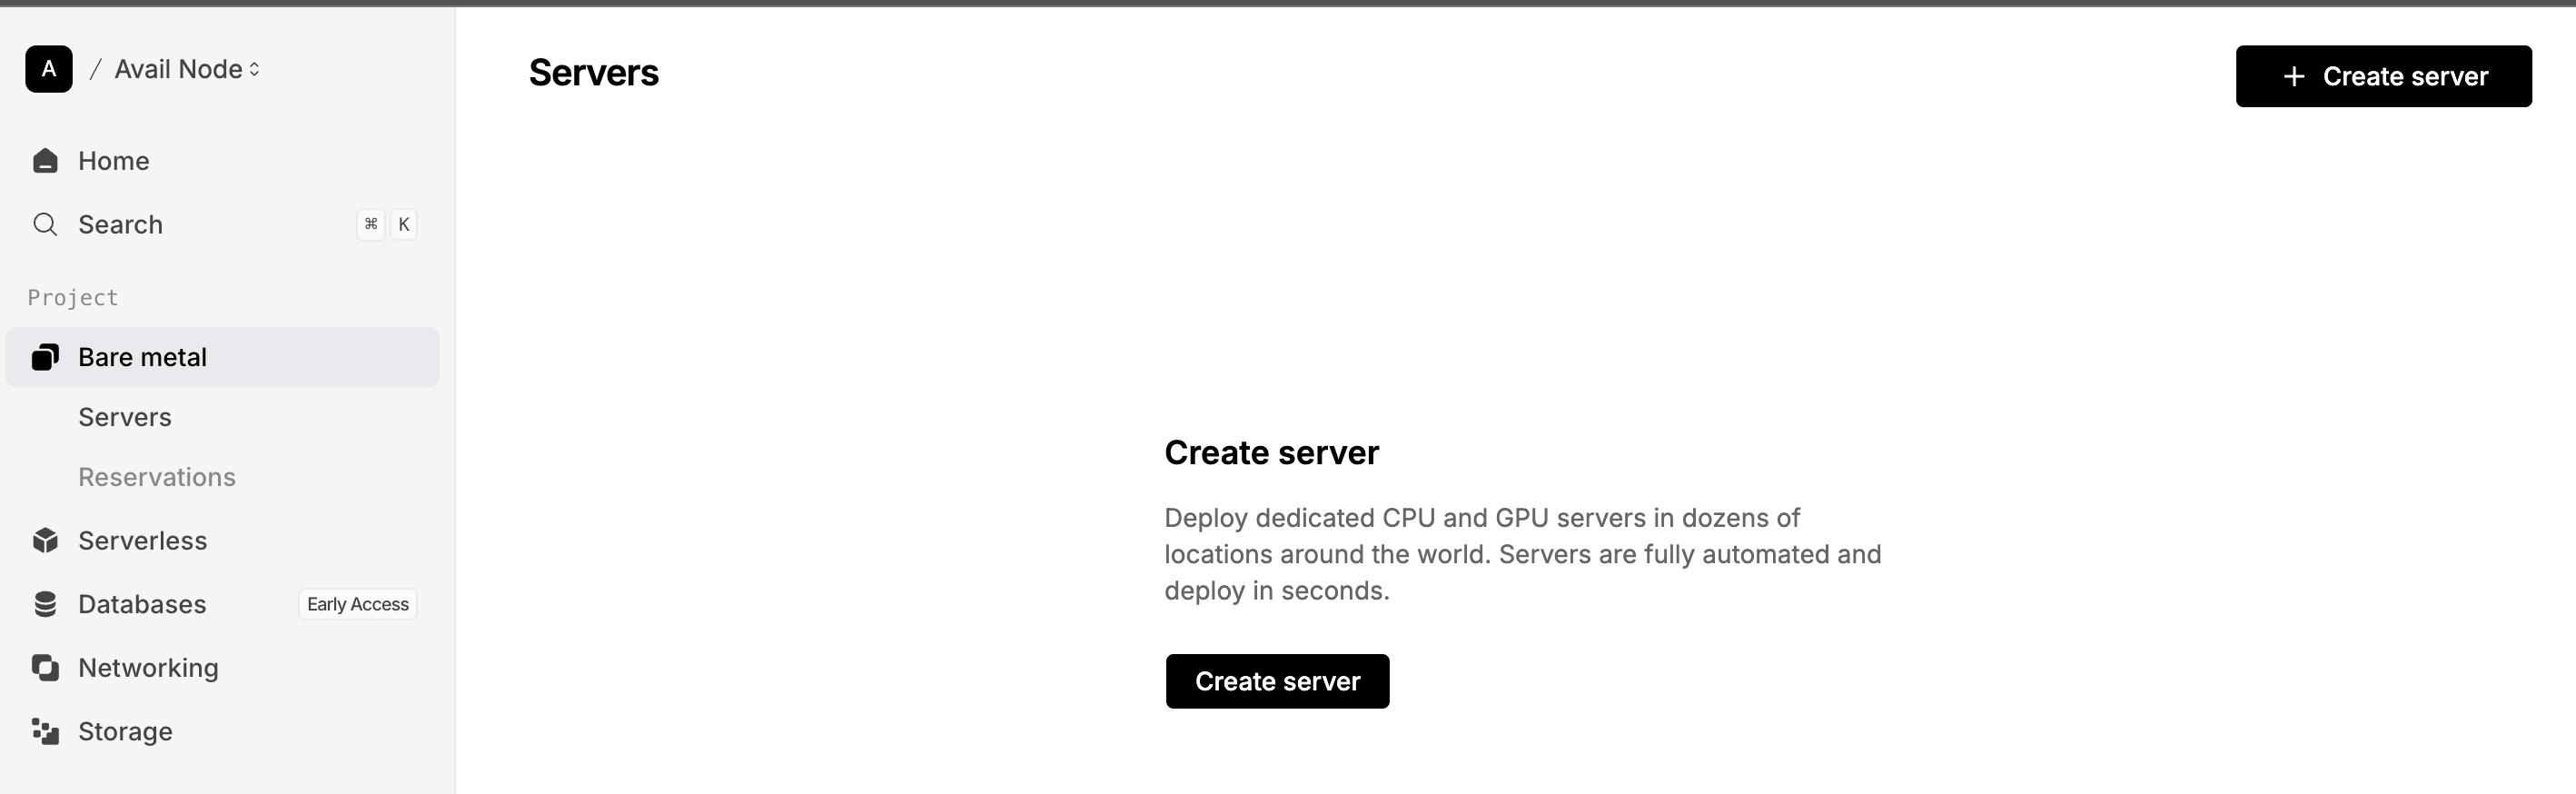
-
Click on the ‘Create Server’ button and choose your desired location and image.
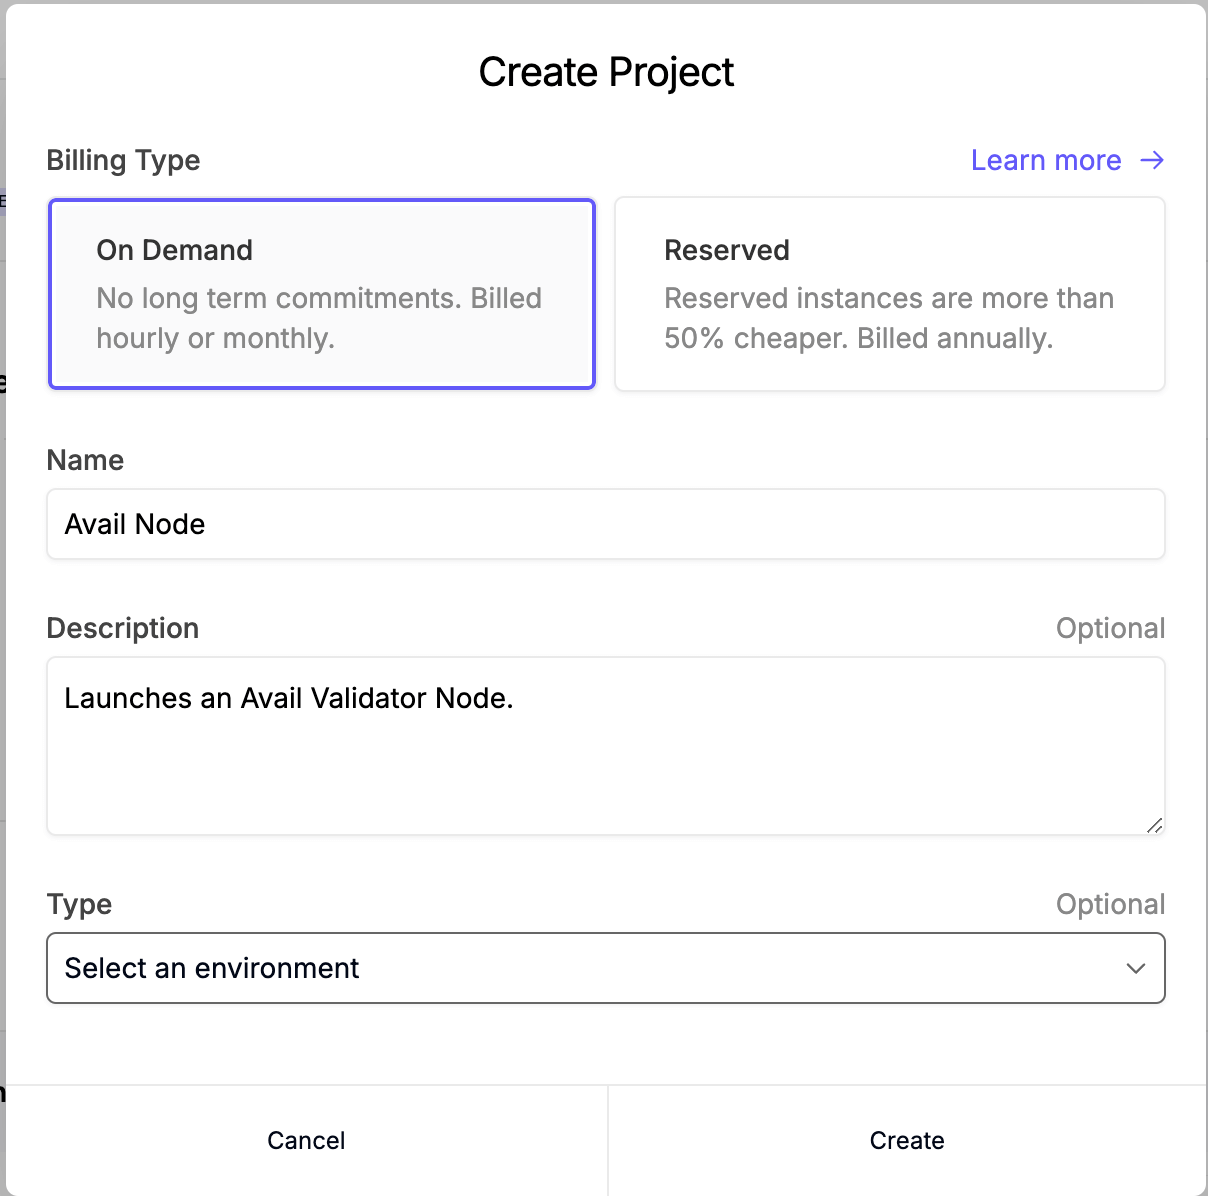
- Click on the ‘Create Server’ button and choose your desired location and image. We’re using Ubuntu 24 for this guide.

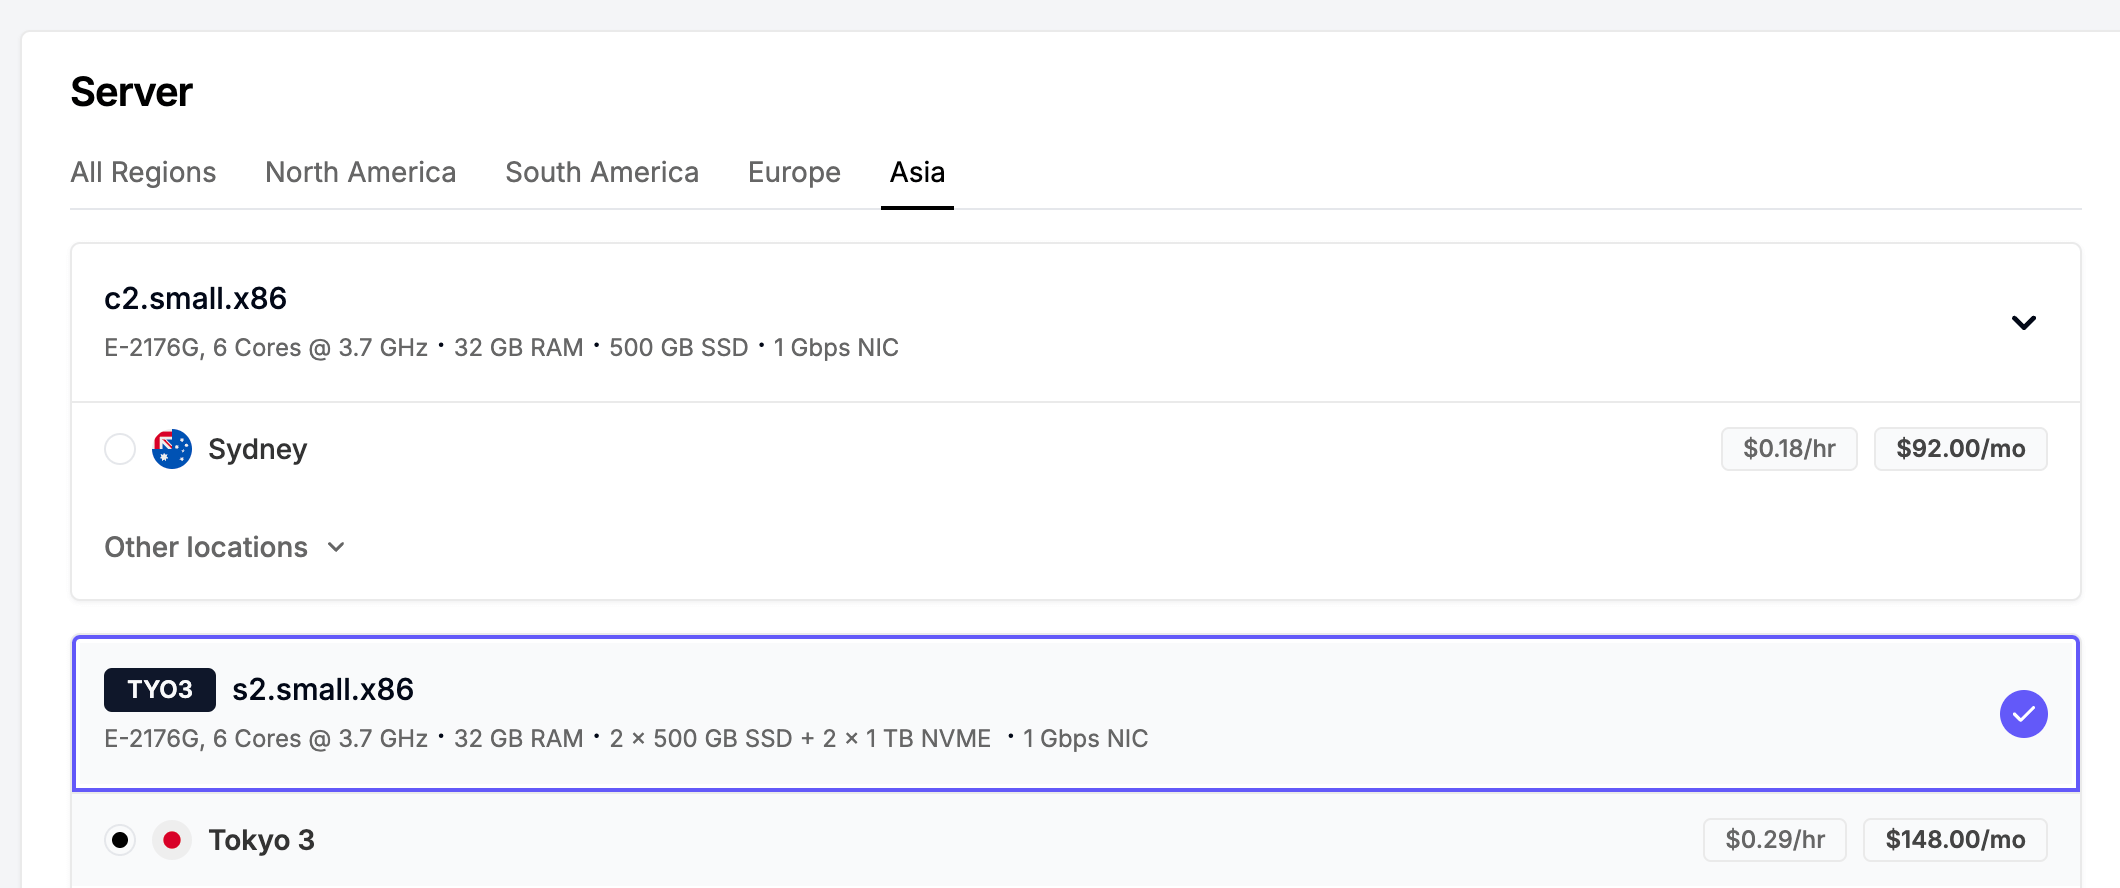
- For the server type,
c2.small.x86,s2.small.x86,c2.medium.x86or anything stronger should do the trick.
- Enter your SSH keys

- Give your server a name.

- Copy the IP and SSH of your server.

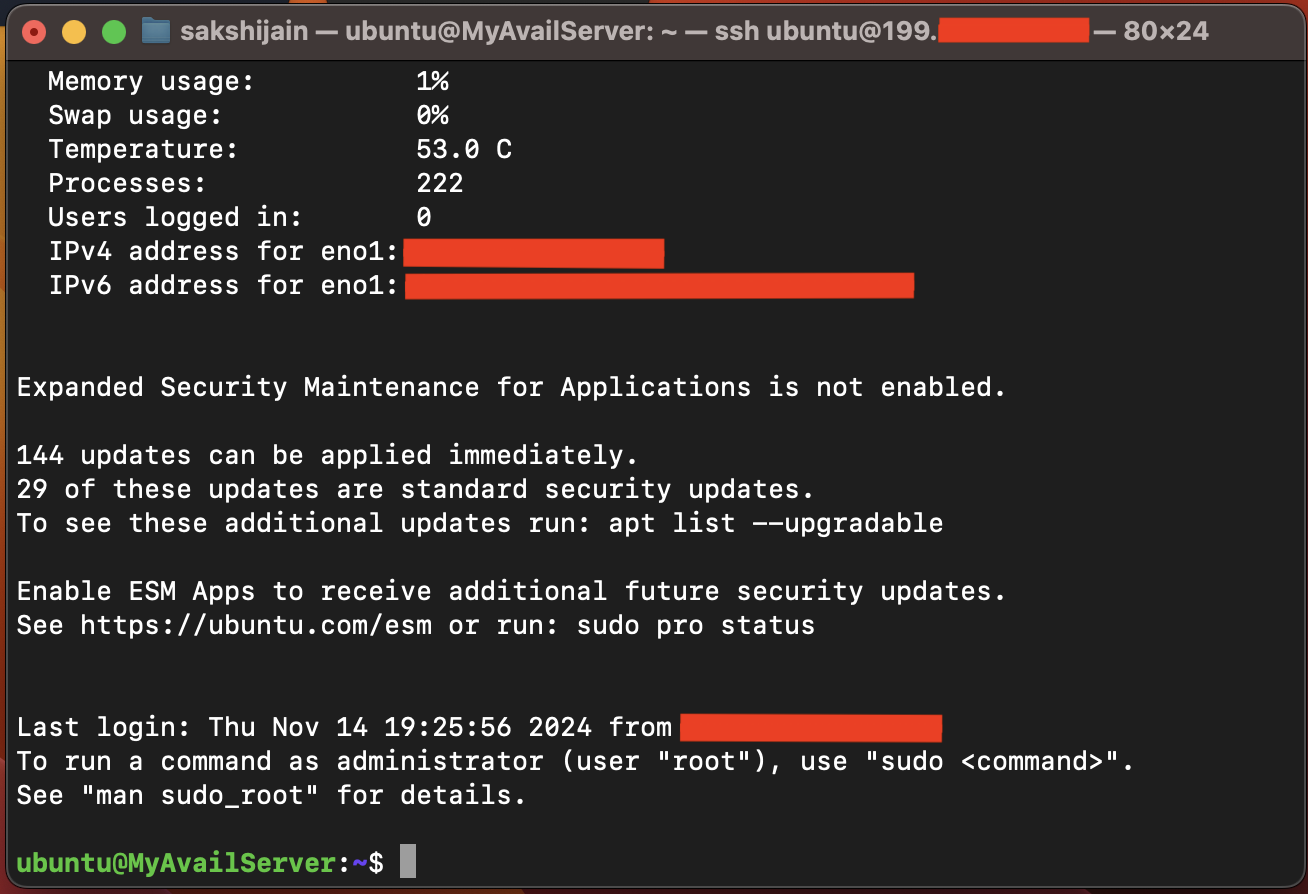
- SSH into your server by running the following command in your terminal:
// Replace the IP with your own
ssh ubuntu@199.xxx.xxx.xxx- If everything is set up correctly, you should see the welcome message:
Bare Metal
We have our server up and online. We updated all our dependencies and are ready to do the work.
BEFORE WE BEGIN
While working with Linux distros, it is a good practice to update the package list and upgrade the system before undertaking major operations. You can use this command to do so:
sudo apt update && sudo apt upgrade -y- Let’s create a folder in the home directory to store our binary and all the data it will generate.
mkdir avail && cd avail
mkdir node-data- Depending on the user and operating system used, the path to our newly created folder can be
/root/availor/home/ubuntu/availor any other variant. To get the full path, run this:”
pwd
# Example output: `/root/avail`- From the Releases Page , we grab the latest version and unpack it.
NODE VERSION FOR TURING
Please note that the Avail node underwent major breaking changes while making upgrades to transition towards Turing.
# Obtaning Latest avail-node version for Ubuntu 22.04
# Put in the latest version in the command below
# wget is a command-line utility for downloading files from the internet.
wget https://github.com/availproject/avail/releases/download/<latest_node_version_here>/x86_64-ubuntu-2204-avail-node.tar.gz

# tar is a command-line utility for working with tarballs, compressed or uncompressed archives containing one or more files or directories.
# The -x option extracts files from an archive, and the -f option specifies the archive file. When used together as tar -xf, it removes the contents of the specified archive file.
tar -xf /root/avail/x86_64-ubuntu-2204-avail-node.tar.gz

# rm stands for "remove" in Linux and Unix-like operating systems. It is used to delete files or directories.
rm -xf x86_64-ubuntu-2204-avail-node.tar.gz
We will create a system service file for our node to run automatically, even on restarts. Systemd will run our node as a daemon and manage it for us. To know more about systemd, go here .
- Create a seperate directory to store all your node data:
mkdir node-data- Let’s create a file on
/etc/systemd/system/and name itavail.service. If you are using a non-root user, you will need to execute this operation using thesudocommand.
For root users:
touch /etc/systemd/system/avail.serviceFor non-root users:
sudo touch /etc/systemd/system/avail.service- Now open that file with your favorite text editor. If this is your first time using Linux first learn how to use nano before doing anything. Just like before, if you are on a non-root use you might need to execute the command using ‘sudo’.
For root users:
# Use nano or any other text editor like vim or emacs
nano /etc/systemd/system/avail.service
For non-root users:
# Use nano or any other text editor like vim or emacs
sudo nano /etc/systemd/system/avail.service- Paste the following text and save it:
[Unit]
Description=Avail Node

[Service]
Type=simple
ExecStart=/root/avail/avail-node --chain mainnet --name {your-name-here} --validator -d /avail/node-data
Restart=always
RestartSec=3
StandardOutput=syslog
StandardError=syslog
SyslogIdentifier=avail-node

[Install]
WantedBy=multi-user.target
Let’s let’s break it down for clarity.
- Description: Provides a human-readable description of the service. In this case, it describes the service as “Avail Node”. This description is mainly used for documentation purposes and can be displayed in various system management tools and commands.
- ExecStart: Specifies the command to start the service. In this case, it runs the /root/avail/data-avail executable with a series of command-line arguments.
- Restart: Defines the restart behavior of the service. In this case, the service will be restarted if it fails.
- RestartSec: Specifies the time to sleep before restarting the service after it exits unexpectedly. In this case, it’s set to 5 seconds.
- WantedBy: Specifies the target or targets that this service should be included in. Here, it is set to multi-user.target, which is a common target for services that should be started in a multi-user system.
We discussed what the command line arguments do in the previous chapter, so we won’t repeat ourselves here.
- Now, let’s enable the service file and start our deamon
For root users:
systemctl daemon-reload
systemctl start avail.service
systemctl enable avail.service
For non-root users:
sudo systemctl daemon-reload
sudo systemctl start avail.service
sudo systemctl enable avail.service- You can check the status of your node by:
systemctl status avail.service- To check for logs, we can run the following command:
# -f Follow the journal
# -n Number of journal entries to show
# -u Show logs from the specified unit
journalctl -f -n 1000 -u avail.service
or
journalctl -u avail.serviceOutput
...
Nov 29 14:56:23 MyAwesomeAvailServer data-avail[13040]: 2023-11-29 14:56:23 ⚙️  Syncing 135.7 bps, target=#93564 (11 peers), best: #1475 (0x1fe8…9dc7), finalized #1024 (0xdff3…8159), ⬇ 1.4MiB/s ⬆ 26.5kiB/s
Nov 29 14:56:28 MyAwesomeAvailServer data-avail[13040]: 2023-11-29 14:56:28 ⚙️  Syncing 144.5 bps, target=#93564 (11 peers), best: #2198 (0xef82…72af), finalized #2048 (0xd68a…5cfc), ⬇ 150.0kiB/s ⬆ 3.7kiB/s
Nov 29 14:56:33 MyAwesomeAvailServer data-avail[13040]: 2023-11-29 14:56:33 ⚙️  Syncing 92.8 bps, target=#93564 (12 peers), best: #2662 (0xdb75…7806), finalized #2560 (0x1282…a791), ⬇ 821.7kiB/s ⬆ 2.6kiB/s
As expected, the node is syncing new blocks. If these logs are new to you, head back to the previous chapter where we explained in detail what they mean.
Docker/Podman
We have our server up and online. We updated all our dependencies and are now ready to do the actual work.
- In the home directory, let’s create a folder where we are going to store all the data that the Avail Docker container will generate.
mkdir avail && cd avail
mkdir node-data
Depending on the user and operating system used, the path to our newly created folder can be /root/avail or /home/ubuntu/avail or any other variant.
- To get the full path, run this:”
pwd
# Example output: `/root/avail`- Depending on your preferences, install Docker or Podman (or both) and execute one of the commands below. Don’t execute all of them.
To read more about Docker, check the following page . To read more about Podman, check the following page . To read more about SELinux, check the following page .
# Option 1: If you are using Docker with non-root user use this script
sudo docker run --restart=on-failure -d -v /root/avail/node-data:/da/node-data -p 9944:9944 -p 30333:30333 docker.io/availj/avail:v1.8.0.3 --chain mainnet -d /da/node-data --validator --name MyAwesomeContainerNode

# Option 2: If you are using Docker on SELinux use this script
docker run --restart=on-failure -d -v /root/avail/node-data:/da/node-data:z -p 9944 -p 30333 docker.io/availj/avail:v1.8.0.3 --chain mainnet -d /da/node-data --validator --name MyAwesomeContainerNode

# Option 3: If you are using Podman use this script
podman run -d -v /root/avail/node-data:/da/node-data -p 9944 -p 30333 docker.io/availj/avail:v1.8.0.3 --chain mainnet -d /da/node-data --validator --name MyAwesomeContainerNode

# Option 4: If you are using Podman on SELinux use this script
podman run -d -v /root/avail/node-data:/da/node-data:z -p 9944 -p 30333 docker.io/availj/avail:v1.8.0.3 --chain mainnet -d /da/node-data --validator --name MyAwesomeContainerNode
Make sure that you replace /root/avail/node-data with your own storage path. If your node-data is located in /home/ubuntu/avail/node-data than the flag should look like this:
-v /home/ubuntu/avail/node-data:/da/node-data.
Let’s break it down for clarity.
- —restart on-failure: It means that the container will be automatically restarted if it exits with a non-zero status, indicating a failure.
- -d: It means that the container will be automatically restarted if it exits with a non-zero status, indicating a failure.
- -v: Is used to mount a volume in a Docker container. Volumes in Docker provide a way to persist and share data between a Docker container and the host system or between different containers.
- -p: is used to publish a container’s port to the host. It allows you to map a port from the container to a port on the host, making services running inside the container accessible from outside.
- docker.io/availj/avail:v1.8.0.3: Refers to the name of the Docker image from which you want to create a container. A Docker image is a lightweight, stand-alone, executable package that includes everything needed to run a piece of software, including the code, a runtime, libraries, environment variables, and config files.
We discussed what the command line arguments do in the previous chapter, so we won’t repeat ourselves here.
Podman doesn’t have the --restart flag, instead it utilizes Quadlets. To know more about how to setup a Quadlet following this link
- To check for logs, we can run the following command:
# Option 1: If you are using Docker with root user use this script
docker logs -f $(docker ps -lq)

# Option 2: If you are using Docker with non-root user use this script
sudo docker logs -f $(docker ps -lq)

# Option 3: If you are using Podman use this script
podman logs -lf
Output
2023-11-29 22:54:56 ⚙️  Syncing 197.6 bps, target=#94986 (8 peers), best: #4363 (0x5374…0cc4), finalized #4321 (0xc708…7dc1), ⬇ 338.7kiB/s ⬆ 2.9kiB/s
2023-11-29 22:55:01 ⚙️  Syncing 62.0 bps, target=#94987 (8 peers), best: #4673 (0x7495…e6ea), finalized #4608 (0x1783…e94d), ⬇ 14.4kiB/s ⬆ 0.3kiB/s
2023-11-29 22:55:06 ⚙️  Syncing 225.4 bps, target=#94987 (8 peers), best: #5800 (0xbc68…13e8), finalized #5632 (0x5180…98c8), ⬇ 129.3kiB/s ⬆ 0.8kiB/s
As expected, the node is syncing new blocks. If these logs are new to you, head back to the previous chapter where we explained in detail what they mean.
What’s Next
This is where our story ends. We have a working node connected to the Turing chain and deployed on a cloud provider. If the system restarts or the Avail Node program suddenly ends, it will be automatically restarted, so there will be almost no downtime.